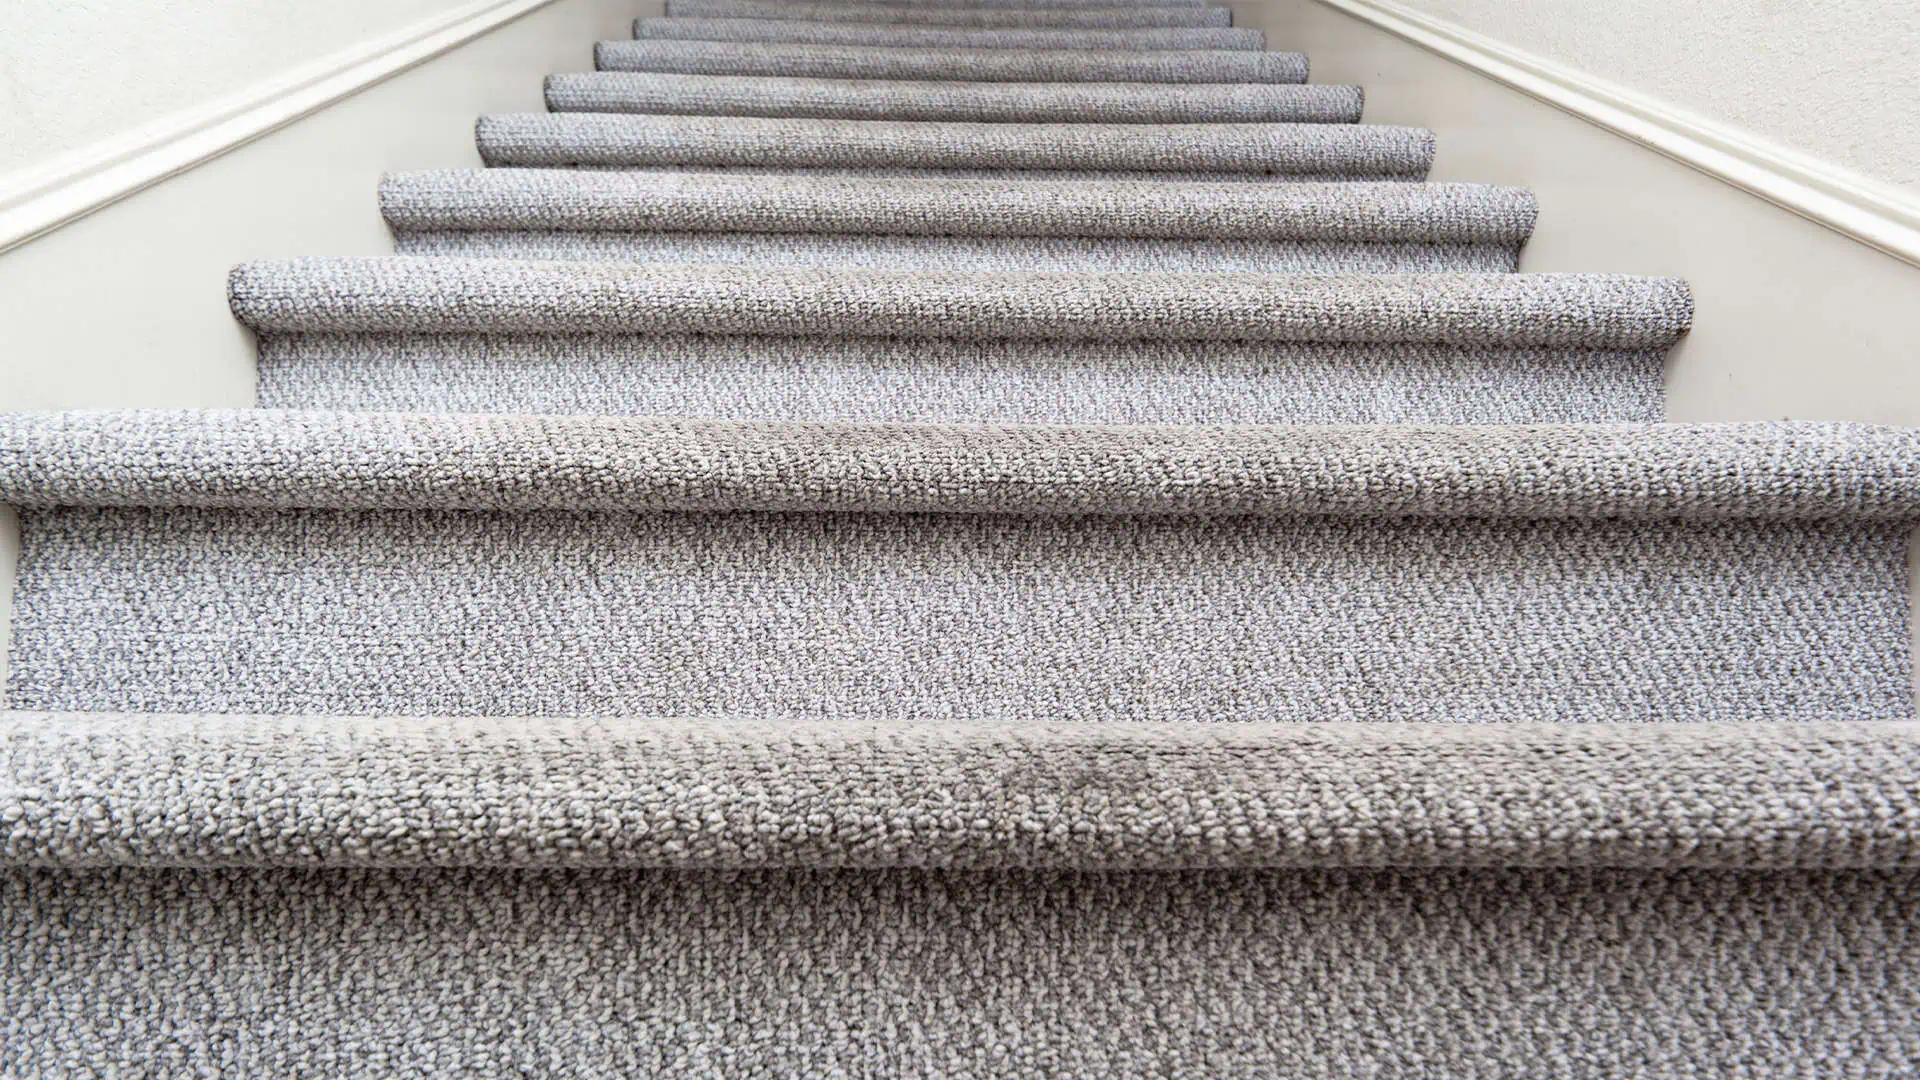
Fitting underlay on stairs is always a good idea. It reduces noise, offers support and comfort underfoot, adds warmth to your home, and protects your carpet from premature wear, extending its lifespan. It’s a no-brainer, isn’t it?
In this guide, we’ll show you step-by-step how to fit your staircase with underlay – whether you’re laying a full-width carpet or a runner.
In this guide
Tools you may need
Here are the tools and materials you’ll likely need to fit underlay on your stairs:
- Knee pads
- Carpet underlay
- Carpet gripper rods
- Gripper shears/hacksaw
- Painter’s/masking tape
- Tape measure
- Stanley knife
- Staple gun
- Straight edge
- Hammer
- Pencil
- Adhesive spray/tape
Why you should lay underlay on the stairs
Think about how much foot traffic your stairs get—they take a real beating! Without that added layer of protection, your carpet or runner will wear quickly, and you will have to fork out for a replacement much sooner than you expected.
The solution: lay a quality underlay first.
Underlay absorbs the impact and racket of constant footsteps, creates a stable and comfortable surface to walk on, provides extra insulation and dramatically increases the lifespan of your flooring.
What underlays work best on stairs?
Underlay is available in various materials—like PU foam, sponge rubber and crumb rubber—and different thicknesses, each with its own helpful features.
On stairs, it’s important to get the balance right. You’ll need a durable product that will withstand heavy footfall. For the ideal combination of comfort, support and noise reduction, we recommend a thickness of 6-9mm with a density rating of at least 110kg/m³.
Here’s our top 3 picks:
- Best value stairs underlay: SU LuxWalk 9mm
- Best high-density stairs underlay: Tredaire Treadmore 7.95mm
- Best underlay for stair runners: Durafit 650
How to fit underlay for full-width stair carpets
Step 1: Prep your stairs
Put on your knee pads and gloves, and remove any old carpet, underlay, nails/staples or debris. Then, vacuum it to make it as clean as possible.
Step 2: Trim and attach your gripper rods
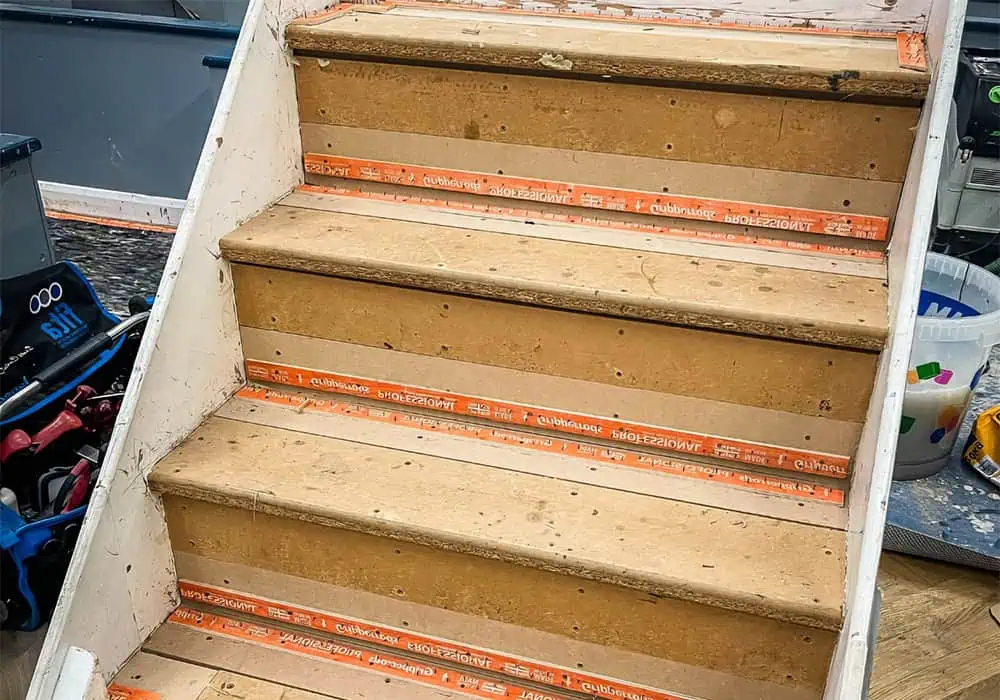
Measure the width of the tread, then take your shears (or a hacksaw) and cut your gripper rods 10mm shorter than this measurement. This allows for 5mm of tuck space on each side of your carpet.
GOOD TO KNOW: The ‘tread’ is the horizontal part of the step you stand on. The ‘riser’ is the vertical part that connects one step to the next.
You’ll need to attach two rods per step:
- Along the back of the tread, about 7mm from the riser, with pins facing it.
- At the bottom of the riser, 7mm above the tread, with pins facing downward.
TOP TIP: To save time, cut your first rod to size and use it as a template to cut the others. Compare them to make sure they’re equal.
Secure your gripper by hammering in the pre-attached nails or using a high-quality adhesive such as GripFill. Remember your gloves—gripper pins are sharp.
Read more:
Step 3: Cut your underlay to size
For easier handling and a more precise fit, we recommend pre-cutting individual pieces of underlay for each step.
Some prefer to apply underlay just on the tread of each step, but for optimal protection and to prolong the life of your carpet, we advise covering the riser, too.
Measure the tread width minus 10mm for carpet tucking. Then, measure the stair depth from the front of the tread gripper over the step and down until you hit the top of the riser gripper. Note these measurements for each step, as staircases can vary wildly.
Mark each of these measurements on your underlay and use your Stanley knife and a straight edge to cut to size.
Step 4: Secure your underlay
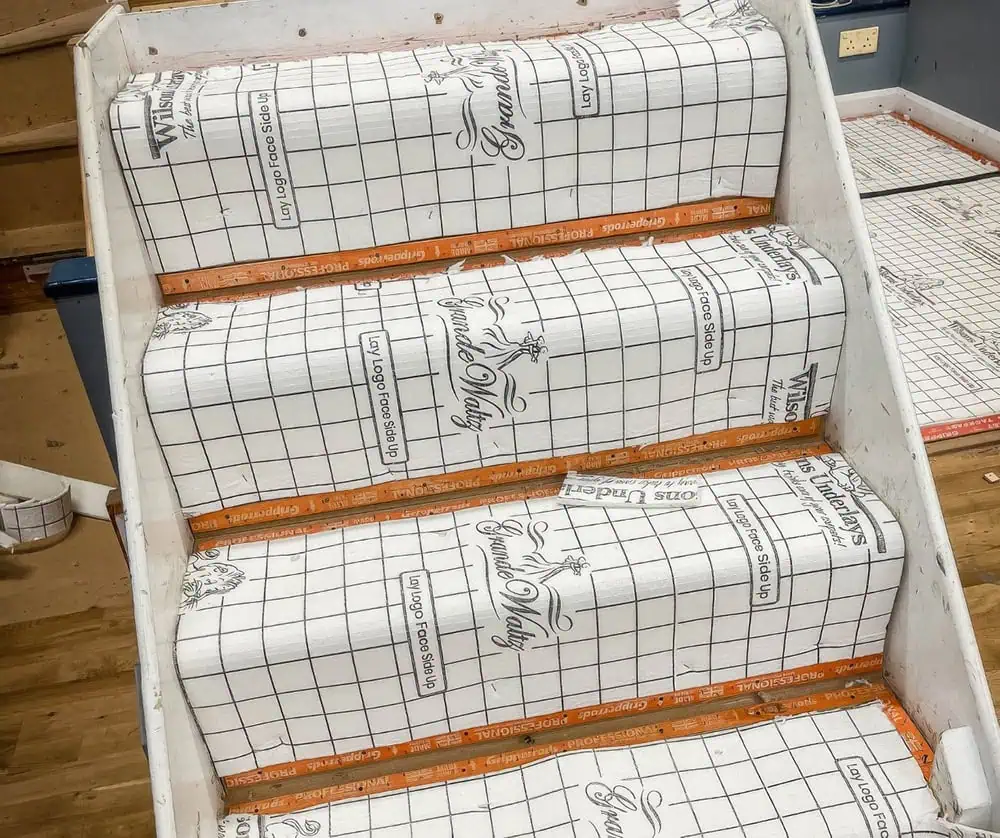
Starting at the top of the staircase, lay your first underlay piece on the tread, ensuring it sits flush between the gripper at each end with no overlap.
Staple it into place every 50mm around the edges to keep it tight.
Pull the remainder of the piece down over the step and attach it flush to the gripper at the base of the riser. Again, make sure there is no overlap on the gripper rod.
PRO TIP: If you’re worried about the underlay shifting when fitting your carpet, apply adhesive spray to each tread before laying each piece.
Step 5: Repeat for all stairs
Continue this method for each step until you reach the bottom of the stairs. Check each piece of underlay is secured tightly with no gaps or bunching.
How to fit underlay for stair runners
If you’ve decided on a runner rather than a full-width carpet, some of the steps in the underlay fitting process are slightly different. Here’s what you need to do:
Step 1: Get your staircase ready
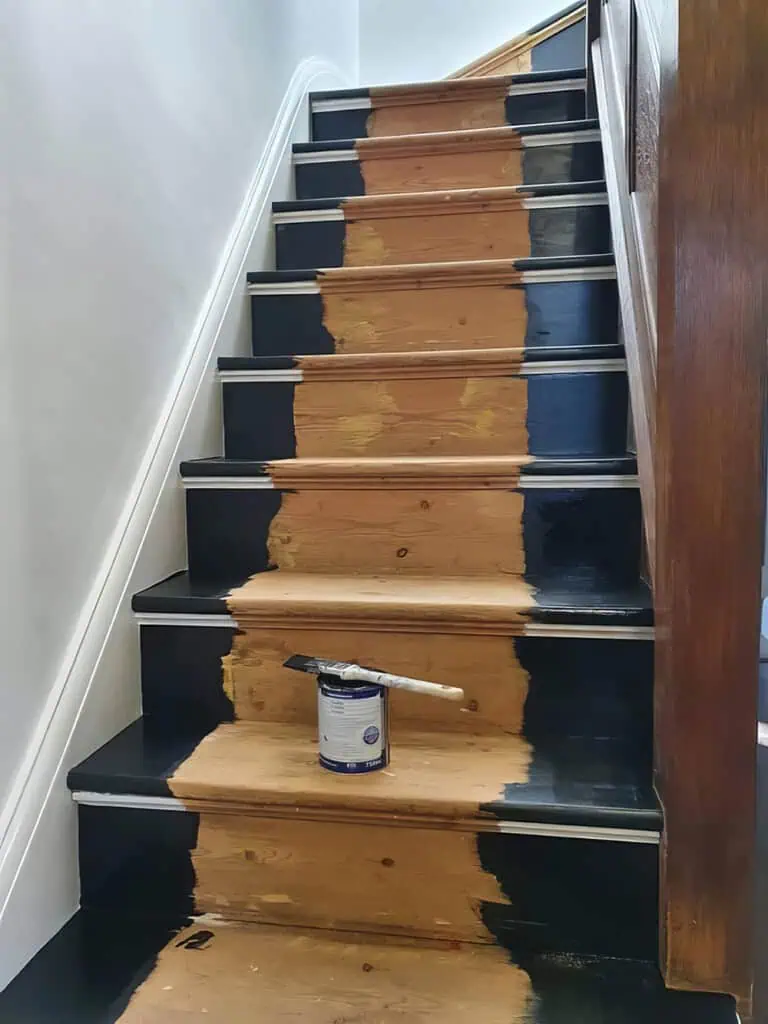
With a runner, either side of your stairs will be on show, so before you go any further, give them a lick of paint and a good clean. It will be much harder to do this once your carpet has been installed.
Step 2: Cut and fit your gripper rods
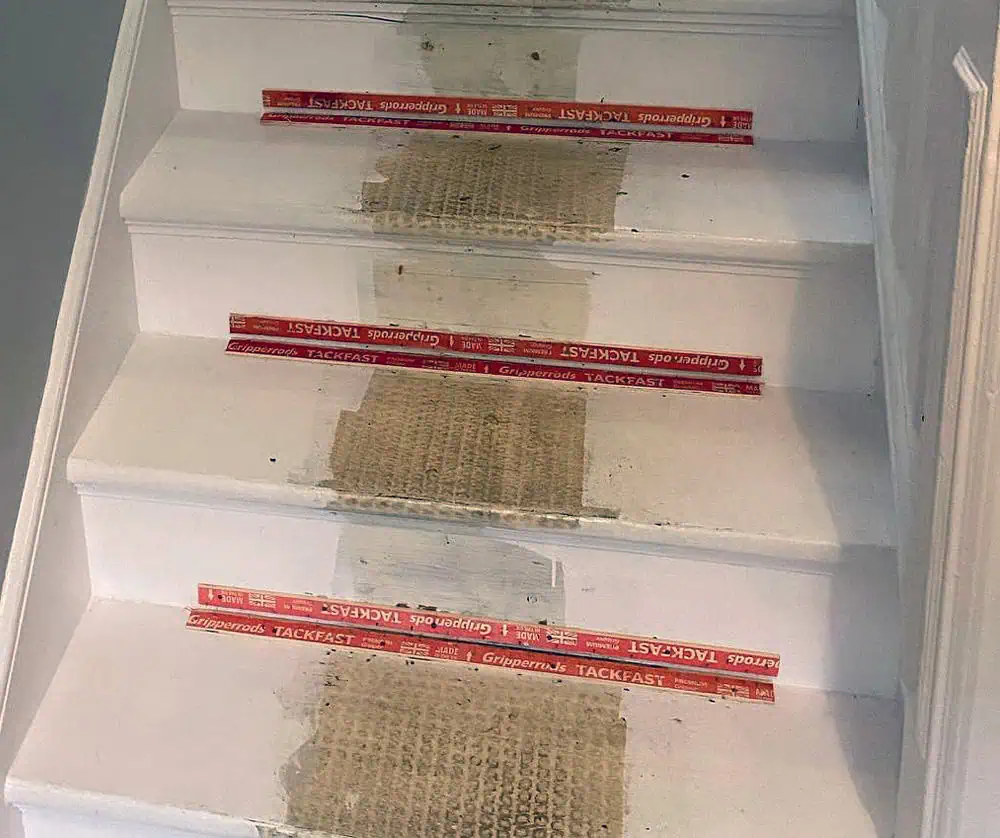
Start by determining the runner width you’d like. Then, measure the width of your stairs, deduct the width of your runner, and divide by two.
Example:
- Stair width: 800mm
- Runner width: 500mm
- 800 – 500 = 300 / 2 = 150mm gap on each side
For ultimate precision, mark these measurements and your midpoint on each tread with painter’s tape – no one wants a wonky runner.
To work out your gripper rod size, measure the width of your runner and deduct 20mm to avoid the rods sticking out of the sides or causing injury.
PRO TIP: If you have an open staircase where you can see through the spindles, it’s wise to deduct slightly more so that the underlay and gripper aren’t as noticeable when looking side-on.
Example:
- If your runner is 500mm wide, cut your rod to 480mm
As with carpet, you’ll still need two rods per step:
- Along the back of the tread, about 7mm from the riser, with pins facing it.
- At the bottom of the riser, 7mm above the tread, with pins facing downward.
It’s imperative you fit the rods centrally on the staircase.
PRO TIP: Use your first rod as a template to make cutting the rest to size quicker.
Step 3: Cut your underlay to size
Some prefer to apply underlay just on the tread of each step, but for optimal protection and to prolong the life of your runner, we advise covering the riser, too.
You’ll need to make sure your underlay is narrower than your runner (to stop it poking out on each side), so mark out the same width as your gripper rods on your underlay.
Then, measure the tread depth from the front of the gripper over the step and down the riser until you hit the top of the gripper. Do these measurements for each step, as staircases can vary wildly.
Step 4: Lay your underlay
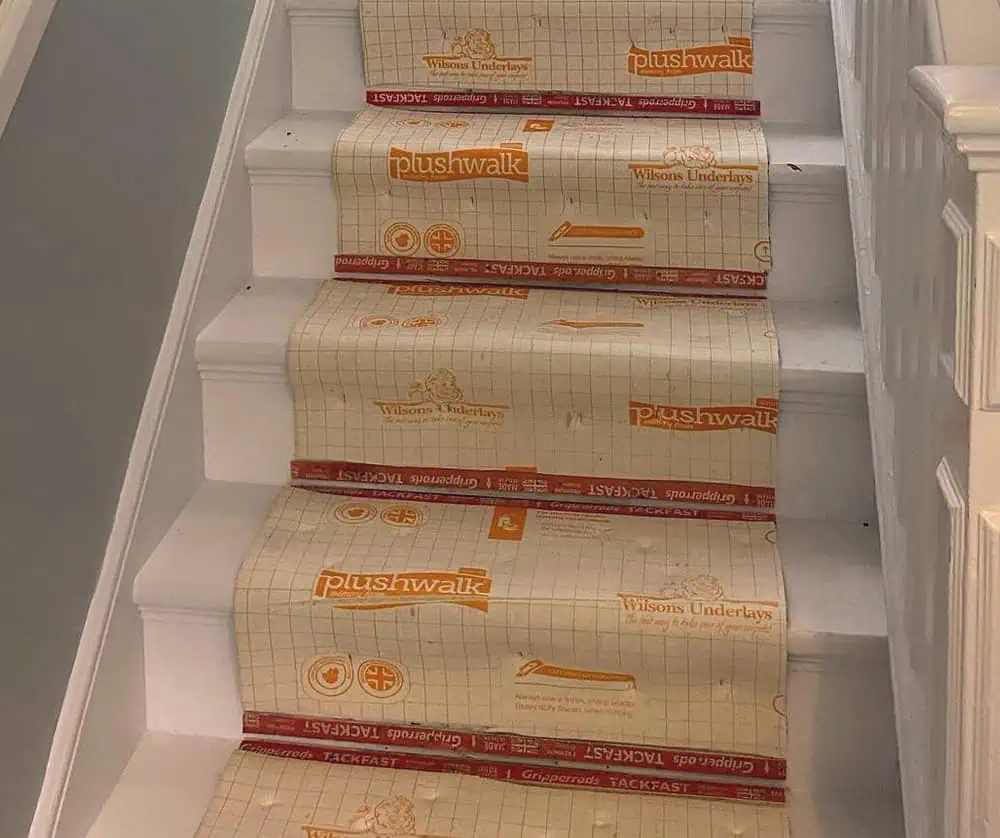
Place your first piece in line with the gripper on the top tread and staple it into place, focusing on the edges of the underlay for extra stability.
Fold the underlay over the edge of the step and down, securing and smoothing as you go, and attach it flush to the gripper at the base of the riser.
Again, for a bit of extra security, you can apply an adhesive spray to the tread to really hold that underlay in place.
Step 5: Repeat for all stairs
Repeat this process for every step and work your way to the bottom. Inspect for any lumps or creases, then get ready to lay your runner.
Admire your handiwork
DIY doesn’t have to be difficult. If you follow the steps in this guide carefully, you’ll be laying underlay like the pros and add years to the life of your stair carpet or runner. Not to mention save money on fitting costs.
Good luck!

